
Table of Contents
Honey Garlic Chicken Thighs
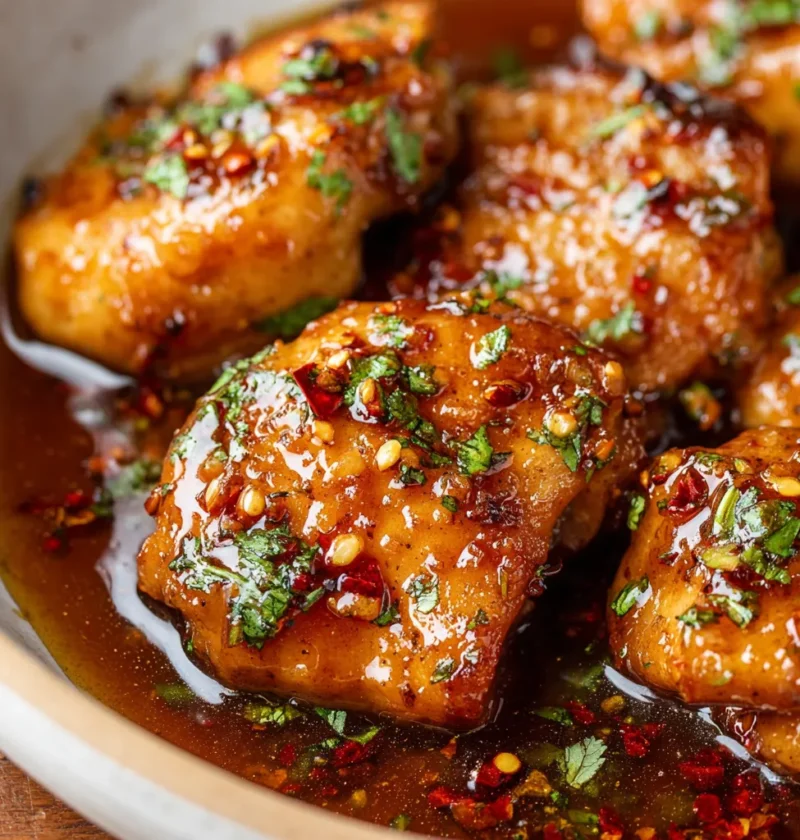
Some nights, you need a meal that feels like it took hours but only took thirty minutes. These honey garlic chicken thighs are exactly that. Sticky, caramelized, and packed with deep savory-sweet flavor, this recipe turns simple boneless chicken thighs into something genuinely crave-worthy.
This is the kind of easy chicken dinner that becomes a weekly staple. The honey garlic soy sauce chicken glaze builds right in the skillet, coating each thigh in a rich, glossy sauce with just enough garlic punch to keep things exciting. No marinating. No fancy equipment. Just one pan and ingredients you likely already have.
Whether you are cooking for a busy weeknight or feeding a crowd on the weekend, this homemade recipe delivers bold flavor with minimal effort. Let’s get into it.
Why You’ll Love This Recipe
- Golden, crispy skin with a caramelized honey crust that forms right in the skillet
- Fall-apart tender inside thanks to the fat content in bone-free chicken thighs
- Under 30 minutes start to finish – a true quick chicken dinner on any weeknight
- One pan, minimal cleanup means more time eating and less time washing dishes
- 5 pantry ingredients for the sauce – honey, soy, garlic, butter, and a splash of vinegar
- Endlessly versatile – works over rice, noodles, salad, or on its own
Ingredients
Chicken
| Ingredient | Amount |
|---|---|
| Boneless, skinless chicken thighs | 6 pieces (about 1.5 lbs) |
| Olive oil | 2 tablespoons |
| Salt | 1 teaspoon |
| Black pepper | 1/2 teaspoon |
| Garlic powder | 1/2 teaspoon |
| Smoked paprika | 1/2 teaspoon |
Honey Garlic Sauce
| Ingredient | Amount |
|---|---|
| Honey | 3 tablespoons |
| Low-sodium soy sauce | 3 tablespoons |
| Fresh garlic, minced | 5 cloves |
| Unsalted butter | 1 tablespoon |
| Apple cider vinegar | 1 tablespoon |
| Red pepper flakes (optional) | 1/4 teaspoon |
| Cornstarch | 1 teaspoon |
| Water | 2 tablespoons |
Garnish
| Ingredient | Amount |
|---|---|
| Fresh parsley, chopped | 2 tablespoons |
| Sesame seeds | 1 teaspoon |

How to Make It
1. Pat and season the chicken (2 min)
Pat each chicken thigh completely dry with paper towels. This step is non-negotiable – moisture is the enemy of a crispy sear. Season both sides with salt, pepper, garlic powder, and smoked paprika.
2. Sear the chicken (8-10 min)
Heat olive oil in a large skillet over medium-high heat until shimmering. Add the chicken thighs in a single layer, smooth side down. Do not move them. Let them sear undisturbed for 5-6 minutes until a deep golden crust forms. Flip and cook another 4-5 minutes.
Pro Tip: Resist the urge to peek or press down on the chicken. Leaving it alone is what builds that golden-edged crust.
3. Mix your sauce (1 min)
While the chicken cooks, whisk together honey, soy sauce, minced garlic, apple cider vinegar, and red pepper flakes in a small bowl. In a separate tiny bowl, mix the cornstarch with water to make a slurry. Set both aside.
4. Build the glaze (3-4 min)
Remove chicken temporarily and set on a plate. Reduce heat to medium. Add butter to the same pan. Once melted, add the garlic from the sauce mixture first and cook for 30 seconds until fragrant. Pour in the rest of the sauce and stir in the cornstarch slurry. Let it bubble and thicken for 1-2 minutes.
5. Finish in the sauce (3-4 min)
Return the chicken to the pan. Spoon the sauce over each piece repeatedly. Cook for another 3-4 minutes until the internal temperature reads 165F and the sauce clings like a glaze.
Pro Tip: Use a meat thermometer to avoid overcooking. Chicken thighs at exactly 165F stay juicy – every time.
6. Rest and garnish
Let the chicken rest in the pan off the heat for 2 minutes. Top with fresh parsley and sesame seeds. Serve immediately.
Macros & Nutrition Table
Per serving (1 chicken thigh with sauce, recipe makes 6 servings)
| Nutrient | Amount |
|---|---|
| Calories | 285 kcal |
| Protein | 28g |
| Total Carbs | 12g |
| Net Carbs | 12g |
| Fat | 14g |
| Fiber | 0g |
| Sodium | 480mg |
Calculation Note: Macros were estimated using the USDA FoodData Central database for boneless skinless chicken thighs (3.5 oz cooked per serving) plus an equal division of all sauce ingredients across 6 servings. Values are approximate and may vary based on the exact size of chicken thighs and specific brands of soy sauce and honey used.
Pro Tips & Variations
Tip 1 – Dry your chicken: Even 10 minutes on a paper towel before cooking makes a visible difference in how well the skin crisps up.
Tip 2 – Make it ahead: Season and sear the chicken up to 2 days in advance. Store without sauce. When ready to serve, reheat in the skillet and add freshly made sauce over medium heat.
Tip 3 – Thicker glaze: If your sauce feels thin, let the chicken simmer uncovered for an extra 2 minutes. The sauce will tighten up beautifully.
Tip 4 – Swap the protein: This exact honey garlic soy sauce works brilliantly on salmon fillets (cut cook time to 3-4 minutes per side) or firm tofu for a plant-based version.
Dietary Variation – Gluten-Free: Swap soy sauce for certified gluten-free tamari in a 1:1 ratio. Every other ingredient in this recipe is naturally gluten-free.
Dietary Variation – Lower Sugar/Keto: Replace honey with a monk fruit sweetener blended with a small amount of molasses (1 tsp per 3 tbsp) to replicate the body and color of honey while cutting the carb load significantly.
Serving Suggestions
- Steamed jasmine rice or brown rice – The extra sauce pools at the base and doubles as a rice drizzle. Pure comfort.
- Roasted broccoli or bok choy – The slightly bitter char of roasted vegetables balances the sweet glaze without overpowering it.
- Rice noodles with a drizzle of sesame oil – Toss the noodles in the leftover pan sauce for a complete meal in one bowl.
Storage & Reheating
Refrigerator: Store cooled chicken thighs in an airtight container for up to 4 days. Keep sauce separate if possible to preserve the texture of the crust.
Freezer: Freeze fully cooked chicken (without garnish) in a zip-lock bag with sauce poured over for up to 3 months. Thaw overnight in the fridge before reheating.
Reheating: For best results, reheat in a covered skillet over medium-low heat with 1-2 tablespoons of water to loosen the sauce. Avoid the microwave if you want to keep the edges from turning rubbery – but if you must, use 70% power in 45-second intervals.
FAQ
Q: Can I use bone-in chicken thighs for this recipe?
A: Yes, bone-in thighs work well but require a longer cook time – plan for 35 to 40 minutes total, finishing in a 400F oven after searing. The bone adds even more flavor to the juicy chicken thighs recipe, so it is worth the extra time when you have it.
Q: What can I substitute for soy sauce in honey garlic chicken?
A: Coconut aminos make an excellent swap – use the same amount and expect a slightly sweeter, milder result. Tamari also works as a 1:1 substitute and keeps the recipe gluten-free. Both options maintain the essence of the honey garlic soy sauce chicken flavor profile.
Q: How do I keep skillet chicken thighs from sticking to the pan?
A: Make sure your oil is properly hot before adding the chicken – a drop of water should sizzle and evaporate on contact. Also, do not try to flip too early. When the chicken releases naturally from the pan, it is ready to turn. Forcing it early causes tearing and sticking.
Q: Is this recipe suitable for meal prep?
A: Absolutely. This easy honey garlic chicken holds up well in the fridge for 4 days. Cook a full batch on Sunday, portion with rice and vegetables, and you have four ready-to-go lunches or dinners. The sauce actually deepens in flavor overnight.
Q: Can I make honey garlic chicken thighs in the oven instead?
A: Yes. Sear the seasoned thighs in an oven-safe skillet for 3 minutes per side, pour the sauce over, then bake at 400F for 18 to 20 minutes. Baste once halfway through. You still get that sticky, caramelized finish without standing at the stove.
Let’s Hear From You
If you made these honey garlic chicken thighs, drop a comment below and tell me how it went. Did you serve it over rice? Add a little extra heat? I read every single comment and love hearing how you make these recipes your own.
If this recipe saved your weeknight dinner, please save it to Pinterest so other home cooks can find it. A quick share on Facebook also goes a long way in keeping this little food corner of the internet growing.
Up next: if you loved the sticky garlic glaze here, you are going to want to try the lemon butter garlic shrimp next. Same bold flavors, same one-pan setup, ready in under 20 minutes.