

Table of Contents
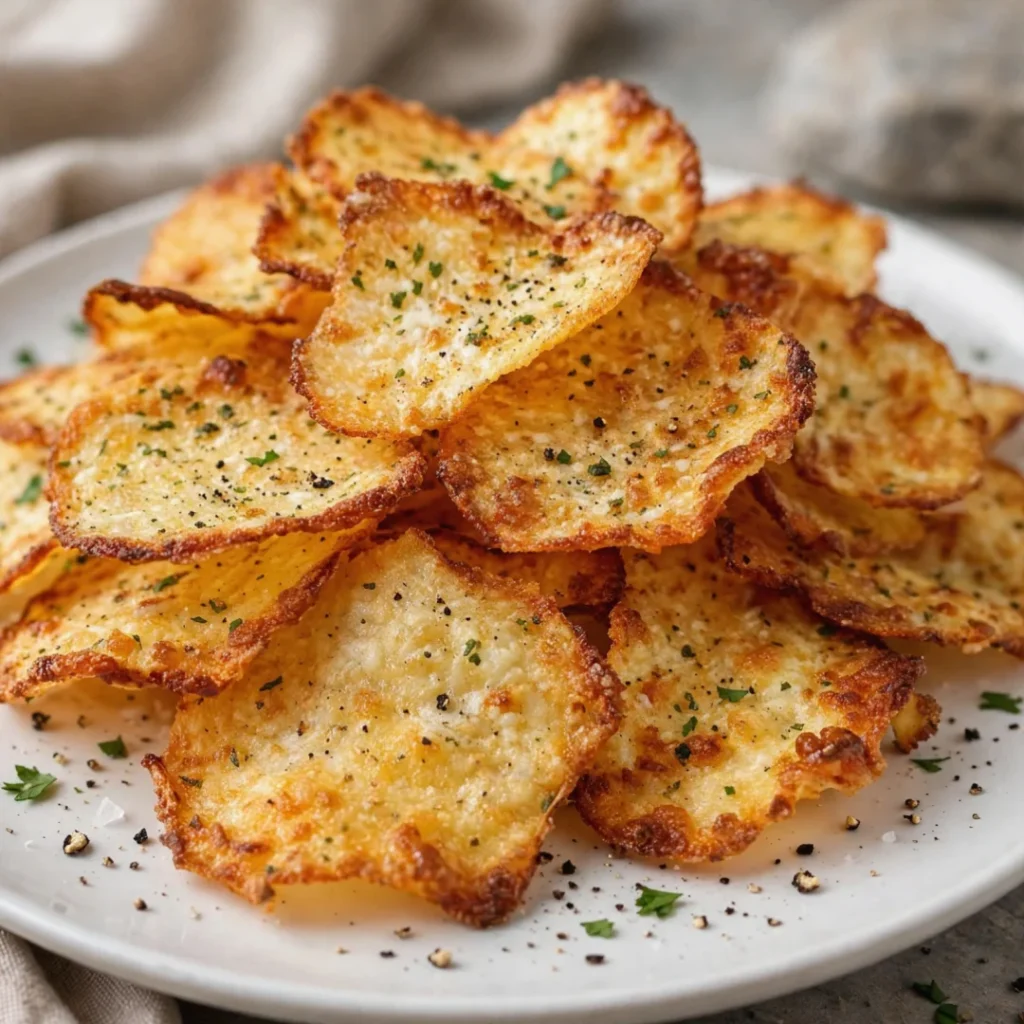
If you’re searching for a guilt-free snack that’s both easy to make and delicious, look no further than Easy and Delicious Cottage Cheese Chips! These savory cheese bites are not only crispy and satisfying but also packed with protein, making them a perfect low-carb snack idea. Imagine crunching into these flavorful cheese crisps while enjoying a movie night or serving them as quick and healthy snacks at your next gathering.
Trust me, these homemade cottage cheese chips will become your new favorite treat! They are a fantastic alternative to store-bought snacks and can be tailored to fit your specific taste preferences, making them versatile for every occasion. You can snack on them guilt-free, knowing they are a great source of nutrition. Plus, these chips provide a wonderful crunch that can satisfy your cravings without the guilt associated with traditional chips!
Why You’ll Love This Recipe
- Quick and easy to prepare with minimal ingredients, perfect for busy weeknights or spontaneous snacking. You can whip them up in under 30 minutes! This makes them ideal for those who find themselves craving a snack but don’t want to spend hours in the kitchen.
- Healthy alternative to traditional chips, packed with protein and lower in carbs, making it perfect for any diet. These chips are a fantastic way to satisfy your crunch cravings without the extra calories, allowing you to indulge without compromising your health goals.
- Customizable flavors to suit your taste preferences; you can easily elevate the flavor profile with your favorite spices. Whether you like it spicy, herby, or smoky, these chips can adapt to your cravings! Try experimenting with different cheese combinations, herbs, or even adding a touch of lemon zest for a refreshing twist.
- Protein-packed appetizer that impresses guests, making them a great addition to any gathering or party platter. Everyone will be asking for the recipe; they are that good! Serve them alongside your favorite dips, and watch them disappear in no time.
- Gluten-free and low-carb, making it suitable for various dietary needs, including keto and paleo diets. You can feel good about serving these chips to friends and family with special dietary restrictions, knowing they can enjoy a tasty snack without worry.
Ingredients
- For the chips:
- 2 cups cottage cheese (preferably low-fat or fat-free for a healthier option; this keeps your chips light and airy, while still providing that creamy base).
- 1 cup shredded cheese (cheddar, mozzarella, or your favorite blend each type offers a unique flavor; for example, cheddar gives a sharp taste, while mozzarella provides a milder flavor that can balance the stronger spices).
- 1/2 teaspoon garlic powder (a must for that savory depth).
- 1/2 teaspoon onion powder (adds a subtle sweetness).
- 1/2 teaspoon smoked paprika (optional, but it adds a delightful smoky flavor that enhances the overall taste, especially if you’re craving something with a barbecue feel).
- Salt and pepper to taste (this is where you can adjust to your preference, ensuring each chip is perfectly seasoned; remember to taste as you mix!).
- 1/4 cup almond flour (for added crunch, optional; you can also use coconut flour for a different texture that brings a subtle sweetness; both options enhance the chip’s overall bite).
Note: Feel free to substitute low-fat cottage cheese with regular cottage cheese for a creamier texture that many find appealing. If you prefer a dairy-free version, try using a nut-based cheese alternative, such as cashew cheese, which blends well and still offers a creamy consistency that rivals traditional cheese. Be sure to choose high-quality ingredients for the best flavor and texture fresh herbs or spices can elevate the taste even further! Using fresh garlic instead of garlic powder can also add a vibrant punch! You can even consider adding a tablespoon of nutritional yeast for an extra cheesy flavor that is vegan-friendly.
Steps / Instructions
Preheat your oven: Set your oven to 400°F (200°C). This temperature will ensure your chips become perfectly crispy! A hot oven is essential for achieving that delightful crunch, so don’t skip this step. Ensuring your oven is preheated properly can make a significant difference in the final texture.
Blend the cottage cheese: In a food processor, blend the cottage cheese until smooth. This step is crucial for achieving a creamy texture that will help the chips hold their shape. A smoother blend will also ensure that every bite is uniformly delicious, so take your time here! If you don’t have a food processor, a blender can work as well; just ensure you scrape down the sides for an even mix.
Add the cheeses and spices: Incorporate the shredded cheese, garlic powder, onion powder, smoked paprika, salt, and pepper into the blended cottage cheese. If using almond flour, add it now as well. Pulse until everything is well combined, creating a thick, cohesive mixture that should be easily scoopable. This is a great time to taste the mixture and adjust the seasoning to your liking. If you want a bit more kick, consider adding a dash of cayenne pepper! Remember, the more flavorful your mixture, the more delicious your chips will be.
Shape the chips: Line a baking sheet with parchment paper. Using a spoon, drop small mounds of the mixture onto the prepared baking sheet, spacing them about 2 inches apart. Flatten each mound slightly with the back of the spoon to form thin discs. The thinness is key; aim for about 1/4 inch thick to ensure even baking and maximum crispiness. If you find the mixture is too runny, a bit more almond flour can help with shaping!
Bake the chips: Place the baking sheet in the preheated oven and bake for 15-20 minutes, or until the chips are golden brown and crispy. Keep an eye on them to avoid burning! If they start to brown too quickly, you can reduce the oven temperature slightly to keep them from over-baking. Rotate the baking sheet halfway through for even cooking; this ensures all chips have the same texture and color.
Cool and serve: Once baked, remove the chips from the oven and let them cool on the baking sheet for a few minutes. They will continue to crisp up as they cool, so exercise some patience! Enjoy them warm or at room temperature! These chips are best enjoyed fresh, but they are still tasty even after they’ve cooled down. Consider serving them with a dip, like salsa or guacamole, for an extra flavor boost! You could even try them with a homemade tzatziki for a refreshing twist.
Tips & Tricks
- Storage: Store any leftover chips in an airtight container at room temperature for up to 3 days. They can also be reheated in the oven for a few minutes to regain their crispiness. Avoid microwaving, as this can make them chewy instead of crunchy. For longer storage, consider freezing the baked chips; lay them out in a single layer on a baking sheet, freeze until solid, then transfer to a bag for convenience.
- Make ahead: You can prepare the mixture ahead of time and store it in the refrigerator for up to 24 hours before baking. Just give it a quick stir before using. This is perfect for those times when you want to have a snack ready to go, especially on busy days when you need something quick! Having the mixture prepped can save valuable time when unexpected guests arrive.
- Common mistakes to avoid: Ensure that the mounds are not too thick; thinner discs will cook more evenly and become crispier. Also, watch the baking time carefully, as ovens can vary. Make sure to check for that golden-brown color, which indicates they are done. Don’t overcrowd the baking sheet, as this can lead to uneven cooking; if necessary, bake in batches for that perfect crisp.
- Experiment: Don’t hesitate to experiment with different spices or herbs to create your unique flavor profiles. Consider adding nutritional yeast for a cheesy flavor boost! You might also try adding a sprinkle of cayenne for some heat or fresh herbs for a delightful aroma. The possibilities are endless, and that’s part of the fun! You can even try adding different cheese varieties, such as pepper jack for a spicy twist or feta for a Mediterranean flair.
Conclusion
Now that you know how to make Easy and Delicious Cottage Cheese Chips, it’s time to get cooking! These addictive snacks are not only simple to whip up but also a wonderful way to satisfy your cravings without any guilt. Don’t hesitate to share your results or variations in the comments below. Happy snacking! Check out our related guide for more tips and tricks on elevating your snack game. Your friends and family are going to love these delightful chips, and you might just inspire them to create their own versions!
Try out this recipe today and experience the joy of homemade cottage cheese chips! If you love this recipe, be sure to save it, share it with friends, or even check out our Cobb Salad for One for another healthy option. Happy cooking! We can’t wait to hear how your chips turn out and what flavor combinations you choose! Don’t forget to snap a picture and tag us on social media to share your culinary adventures!
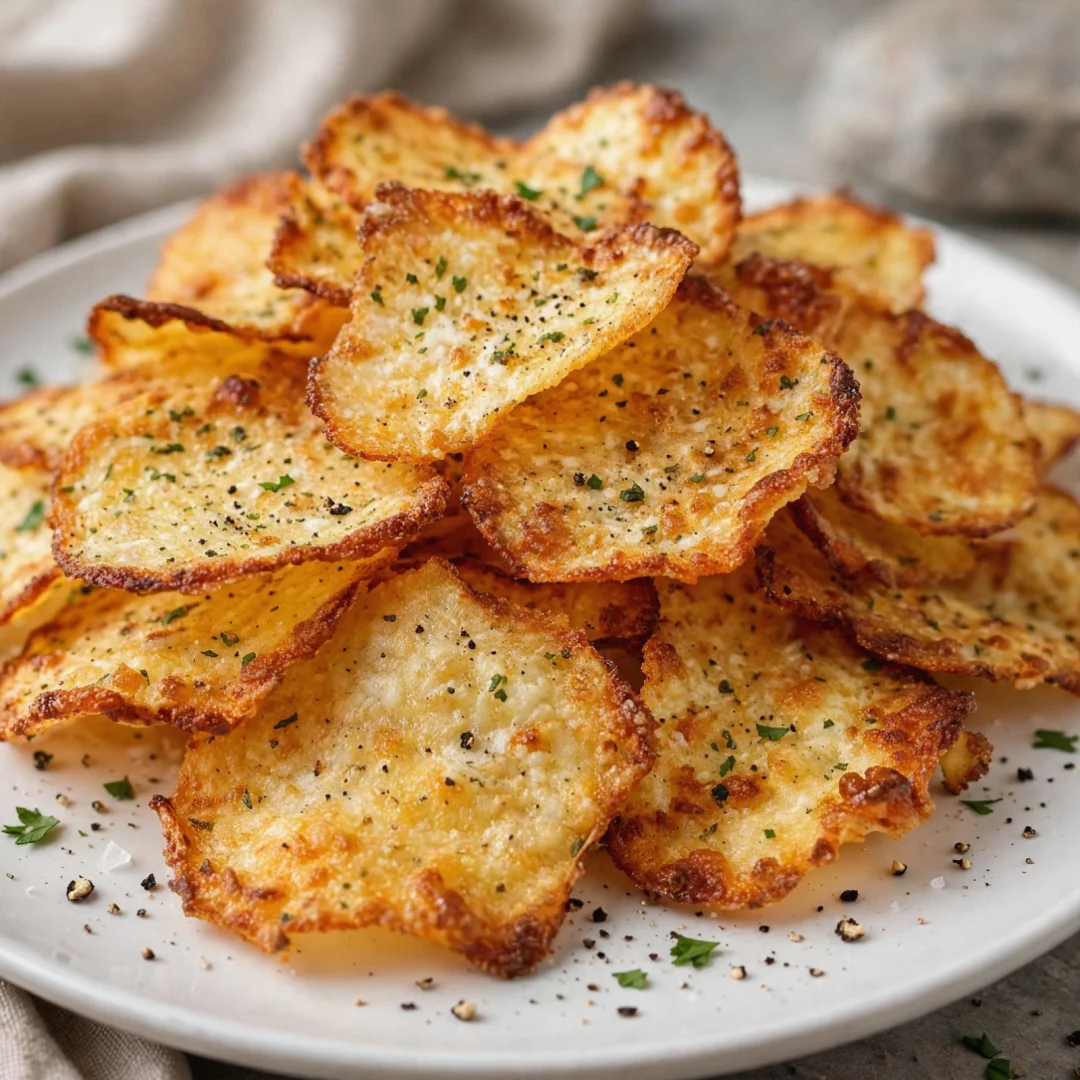
Easy and Delicious Cottage Cheese Chips
A guilt-free snack that’s both easy to make and delicious, these savory cheese bites are crispy, satisfying, and packed with protein.
Ingredients
- 2 cups cottage cheese (preferably low-fat or fat-free)
- 1 cup shredded cheese (cheddar, mozzarella, or your favorite blend)
- 1/2 teaspoon garlic powder
- 1/2 teaspoon onion powder
- 1/2 teaspoon smoked paprika (optional)
- Salt and pepper to taste
- 1/4 cup almond flour (optional)
Directions
Preheat your oven to 400°F (200°C).
In a food processor, blend the cottage cheese until smooth.
Incorporate the shredded cheese, garlic powder, onion powder, smoked paprika, salt, and pepper into the blended cottage cheese. If using almond flour, add it now as well. Pulse until everything is well combined.
Line a baking sheet with parchment paper. Drop small mounds of the mixture onto the prepared baking sheet, spacing them about 2 inches apart and flattening them slightly.
Place the baking sheet in the preheated oven and bake for 15-20 minutes, or until the chips are golden brown and crispy.
Once baked, let the chips cool on the baking sheet for a few minutes before serving.
Nutrition Facts
Recipe Reviews
- ★★★★★
Excellent recipe!
Leave a Reply
Your email address will not be published. Required fields are marked *


Excellent recipe!