
Table of Contents
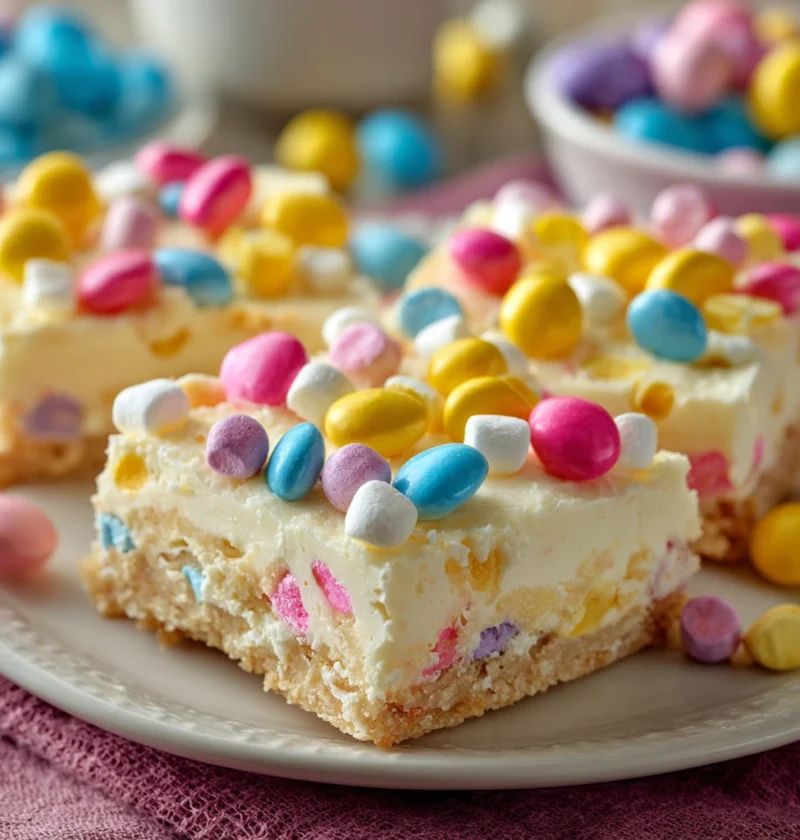
Marshmallow Easter Bars
Easter dessert doesn’t get easier — or more irresistible — than this. These marshmallow Easter bars combine creamy white chocolate, fluffy mini marshmallows, and festive Easter candy into a no-bake treat that looks stunning, tastes like a dream, and takes less than 30 minutes including set time. No oven required, no special equipment, no baking experience needed.
This recipe is for anyone who wants a show-stopping holiday treat without the stress of actual baking. Whether you’re making these with kids on Easter morning, building out a dessert table for a spring gathering, or filling Easter baskets with homemade treats, these bars tick every box. The white chocolate melts into a silky, sweet base that sets perfectly firm with a satisfying snap, the marshmallows stay soft and pillowy inside, and the pastel Easter candy on top makes each bar look like it came from a specialty confectionery shop. Set them in the freezer for 20 minutes and they’re done — it’s almost unfair how easy these are.
Why You’ll Love This Recipe
- Only 4 ingredients — white chocolate, marshmallows, Easter candy, and shortening
- No oven, no baking, no stress — entirely no-bake from start to finish
- Done in 30 minutes including set time — faster than any baked Easter dessert
- Kid-friendly to make and eat — simple enough for little hands to help every step
- Completely customizable — swap the candy for any Easter mix-ins you love
- Makes 16 bars — perfect for a crowd, a bake sale, or filling Easter baskets
- Beautiful presentation with zero decorating skill — the candy does all the visual work
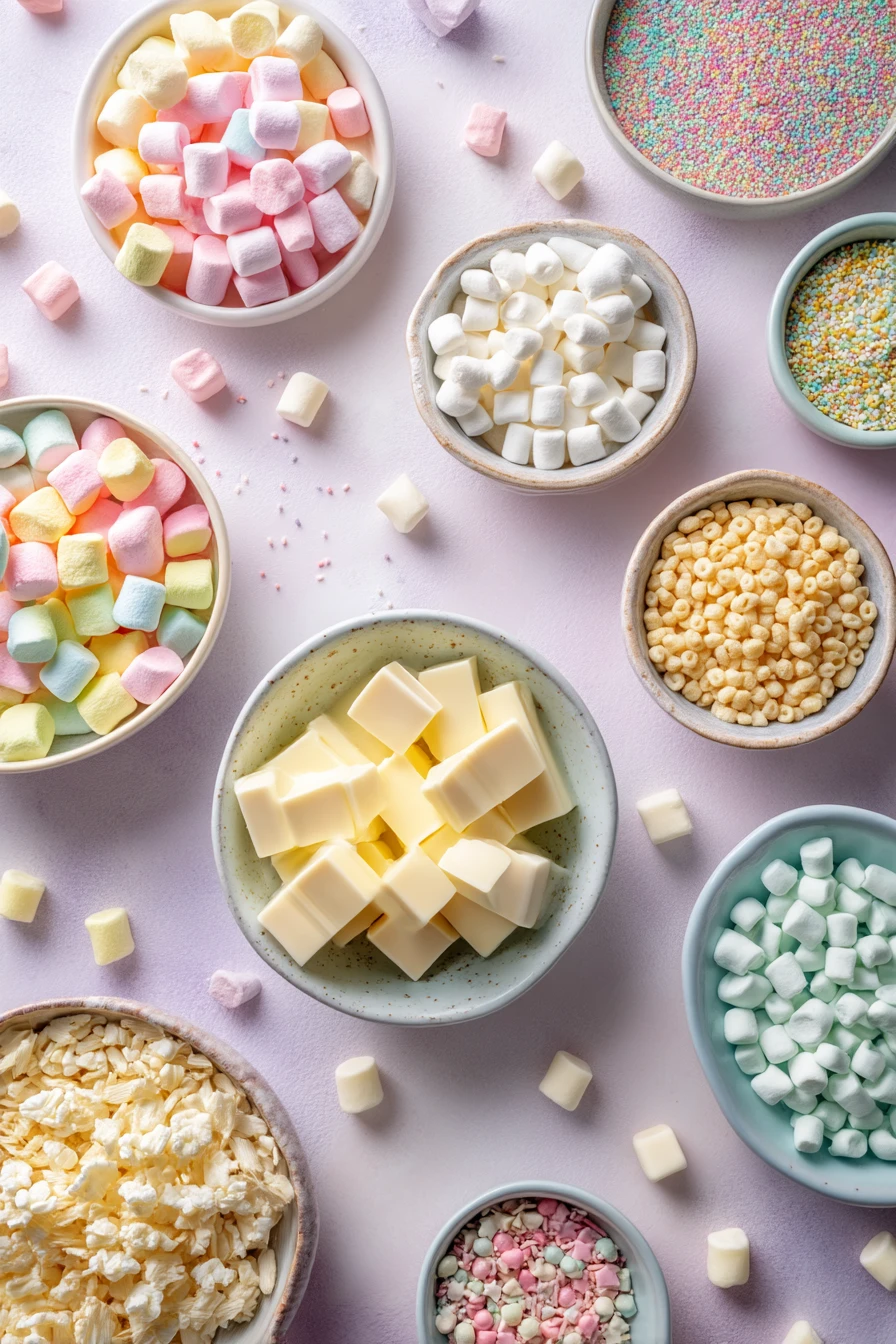
Ingredients
Base
- 1½ cups (255 g) white chocolate chips or white candy melts — candy melts are more forgiving to melt and set firmer; white chocolate chips need shortening added for a smooth, fluid consistency
- 1 tbsp (12 g) vegetable shortening — only needed if using white chocolate chips; helps thin the chocolate to a smooth, pourable consistency that coats the marshmallows evenly; skip if using candy melts
Mix-ins & Topping
- 3½ cups (175 g) mini marshmallows — mini marshmallows coat more evenly than regular-sized; use fresh, soft marshmallows for the best texture
- 1 container (4.5 oz / 127 g) Sixlets or pastel M&Ms in Easter colors, divided — use half stirred into the mixture, half pressed on top for the best visual
Optional Upgrades (for a more elevated bar)
- 2 tbsp (18 g) Easter-colored sprinkles or nonpareils
- ¼ tsp (1.25 ml) pure vanilla extract — stirred into the melted chocolate for depth
- ¼ tsp (1.25 ml) coconut extract — pairs beautifully with white chocolate
- Pastel candy-coated chocolate Easter eggs — pressed on top for a dramatic, festive finish
Step-by-Step Instructions
Prep the pan. Line an 8×8-inch (20×20 cm) baking dish with parchment paper, leaving overhang on two sides to act as handles for easy removal. Smooth the parchment flat against the bottom and sides — wrinkles in the parchment create wrinkles in the bottom of your bars. [PRO TIP: Use two strips of parchment laid perpendicular to each other for full overhang on all four sides — this makes lifting the set bars out completely effortless.]
Melt the white chocolate. Set up a double boiler by placing a heatproof bowl over a saucepan of barely simmering water — the bottom of the bowl should not touch the water. Add the white chocolate chips and shortening (if using) and stir continuously with a silicone spatula until completely smooth and silky. [PRO TIP: White chocolate burns far more easily than dark or milk chocolate — keep the heat on the lowest simmer and never stop stirring. Scorched white chocolate turns grainy and cannot be fixed.]
Remove from heat and cool briefly. Take the bowl off the heat and let the melted chocolate sit for exactly 1–2 minutes. This brief rest brings the temperature down just enough so the marshmallows don’t immediately start melting on contact — you want them coated, not dissolved.
Add the marshmallows and candy. Working quickly, add the mini marshmallows and half the Sixlets or M&Ms to the warm chocolate. Stir with a spatula using confident, deliberate folds until every marshmallow is coated in white chocolate. Move fast — the longer you take, the more the marshmallows will melt into the chocolate rather than staying whole and fluffy. [PRO TIP: The goal is coated marshmallows with visible white chocolate binding everything together — if the mixture looks like it’s becoming one solid mass, you’ve waited too long after removing from heat. Speed is the skill here.]
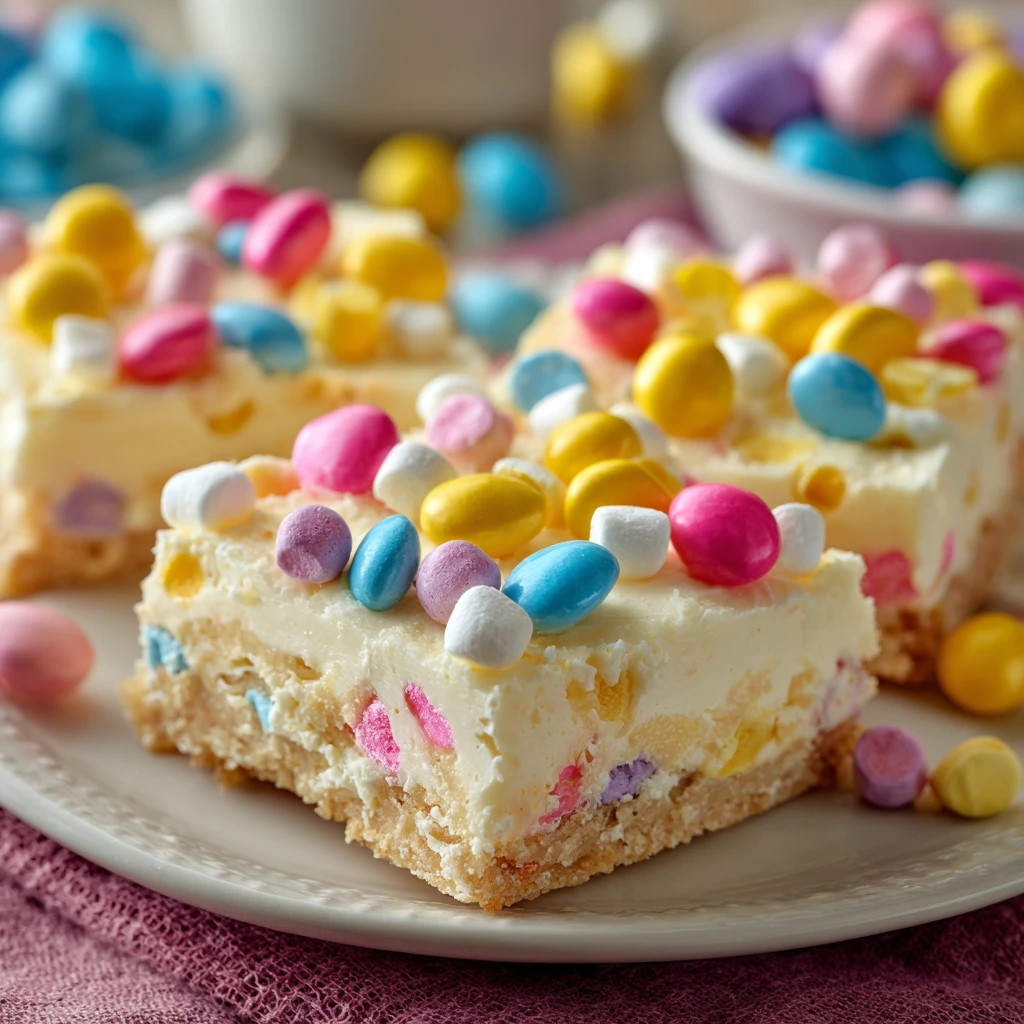
Transfer to the pan. Pour the mixture into the prepared parchment-lined dish and spread into an even layer using a lightly greased spatula or the back of a spoon. Press gently to fill the corners and create a flat, uniform surface — uneven bars will cut unevenly and some will be thinner and more fragile than others.
Decorate the top. Immediately scatter the remaining Sixlets or M&Ms evenly across the surface, pressing each piece down lightly so it adheres to the still-soft chocolate base. Add sprinkles and Easter egg candies now if using — they need to be pressed in while the chocolate is still warm and tacky enough to hold them in place.
Set in the freezer. Place the dish in the freezer for 20 minutes until the chocolate is fully set and firm. The bars should feel solid and hold a clean edge when you press the surface — not soft or sticky.
Cut and serve. Lift the slab out of the pan using the parchment overhang and place on a cutting board. Use a sharp chef’s knife to cut into 16 equal squares — wipe the blade clean between cuts for the sharpest, cleanest edges. Serve immediately or store as directed below.
Macros & Nutrition Table
Per serving (1 bar — based on 16 bars from one 8×8 pan, standard recipe with Sixlets):
| Nutrient | Amount |
|---|---|
| Calories | 155 kcal |
| Protein | 1 g |
| Total Carbs | 24 g |
| Net Carbs | 24 g |
| Fat | 6 g |
| Fiber | 0 g |
| Sugar | 19 g |
Note: Macros calculated using USDA FoodData Central data for white chocolate chips, mini marshmallows, and Sixlets candy at the exact quantities listed, divided across 16 bars. Values are estimates and will vary based on chocolate brand, candy type, and exact bar size. Optional add-ins like sprinkles and extra Easter eggs are not included.
Expert Tips & Variations
3 Tips for Perfect Bars Every Time
Work fast once the marshmallows go in. White chocolate cools and thickens quickly, and mini marshmallows begin absorbing heat from the chocolate almost immediately. From the moment you add the marshmallows to the bowl, you have about 60–90 seconds to fold, transfer to the pan, and spread before the mixture becomes too stiff to work with. Have your pan lined and your candy portioned before you even start melting the chocolate.
Use candy melts instead of white chocolate chips for a beginner-proof melt. White chocolate chips require precise temperature control and shortening to melt smoothly — even a small amount of water or steam will seize them into a grainy paste. Candy melts are formulated to melt evenly at a wider range of temperatures and set with a firmer, glossier finish that holds up better at room temperature. For a first-time maker, candy melts are simply more reliable.
Don’t skip the parchment. White chocolate grips the sides of a baking dish tenaciously — without parchment, you’ll either destroy the bars trying to lever them out or leave half the batch stuck to the pan. The parchment sling also makes lifting and cutting on a flat surface infinitely cleaner and gives you straighter, more defined bar edges.
3 Recipe Variations
- Cookie dough base version: Press a layer of pre-made sugar cookie dough into the bottom of a greased 9×13-inch pan, bake at 350°F for 12 minutes until just set, then pour the marshmallow white chocolate mixture over the warm base and top with Easter candy. Refrigerate 4 hours and cut — a chewy, layered bar that’s one step up from the no-bake version.
- Easter crunch cereal version: Stir 6 cups of Rice Krispies or Corn Chex cereal into the melted butter-marshmallow mixture (like a standard Rice Krispie treat), then fold in pastel M&Ms and Easter sprinkles. Press into a 9×13 pan and top with extra candy. A crowd-pleasing, crunchy alternative that uses pantry ingredients.
- Milk chocolate version: Swap the white chocolate for milk or dark chocolate chips and use Halloween candy colors for a completely different holiday version of this same foolproof method. The darker chocolate base pairs especially well with toasted coconut folded into the mixture alongside the marshmallows.
Storage & Reheating
Store cut bars in an airtight container at room temperature for up to 3 days — keep layers separated by parchment paper so the candy doesn’t stick bars together. Refrigerate for up to 1 week for a firmer, chewier texture that many people actually prefer. These bars freeze beautifully for up to 2 months — wrap each bar individually in plastic wrap and place in a zip-lock bag. Thaw at room temperature for 15–20 minutes before serving. No reheating needed or recommended — these are a cold-set treat.
FAQ
Q: Can I make marshmallow Easter bars ahead of time?
A: These are one of the best make-ahead Easter treats you can make. Prepare them up to 5 days in advance, store in an airtight container in the fridge between layers of parchment, and bring to room temperature 10 minutes before serving. The flavor and texture actually hold perfectly — there’s no quality loss from making them early, which makes them ideal for holiday prep.
Q: Why did my white chocolate seize and turn grainy?
A: White chocolate seizes when it comes into contact with even a tiny drop of water or steam, or when it overheats above 110°F (43°C). Ensure your bowl and spatula are completely dry before starting, keep the water in the double boiler at the lowest possible simmer, and stir continuously. If your chocolate does seize, stir in a teaspoon of warm coconut oil or vegetable shortening — this sometimes rescues a slightly seized batch.
Q: Can I use regular-sized marshmallows instead of mini?
A: You can — cut each regular marshmallow into quarters with kitchen scissors dipped in powdered sugar to prevent sticking. The smaller pieces coat more evenly in the chocolate and give a more consistent texture in each bar. Mini marshmallows are genuinely easier here, but quartered regulars work as a direct substitute.
Q: What Easter candy works best in these marshmallow bars?
A: Any candy-coated chocolate works beautifully — Sixlets, pastel M&Ms, Robin Eggs (malted milk Easter eggs), and Cadbury Mini Eggs are all excellent choices. Avoid gummy candies or anything with a high moisture content, as they can soften the chocolate base and make the bars sticky. Hard candies also work for decoration but can be difficult to bite through cleanly when the bars are served.
Q: How do I get clean, even cuts on no-bake bars?
A: Three things: let the bars set completely firm before cutting (20 minutes in the freezer is the minimum), use a large sharp chef’s knife rather than a serrated knife, and wipe the blade clean with a warm damp cloth between every single cut. Pressing straight down in one clean motion rather than dragging the knife gives the sharpest, most defined bar edges.
Conclusion
Marshmallow Easter bars are the holiday treat that delivers maximum festive impact for minimum effort — four ingredients, no oven, 30 minutes, and a result that looks bakery-made and tastes even better. They’re the perfect project to make with kids, the easiest addition to any Easter dessert table, and the recipe that people always ask you for.
Make a batch this Easter and drop a comment below telling me which candy you used on top — I love seeing the colorful variations! Save this to your Pinterest boards so next Easter is already sorted.
Marshmallow Easter Bars
Indulge in a delightful Easter treat with Marshmallow Easter Bars, combining the sweetness of marshmallows with a crunchy graham cracker crust. These bars are perfect for holiday dessert tables or homemade sweet cravings.
Ingredients
- 2 cups graham crackers, crushed
- 1/2 cup butter, melted
- 3 cups marshmallows
- 1 teaspoon vanilla extract
Directions
-
Preheat oven to 350°F and line a baking dish with parchment paper.
-
Mix crushed graham crackers and melted butter in a bowl until well combined.
-
Press the graham cracker mixture into the bottom of the prepared baking dish to form the crust.
-
Bake the crust for 10 minutes until set.
-
Remove from the oven and sprinkle marshmallows evenly over the top.
-
Return the dish to the oven and bake for an additional 5-7 minutes until marshmallows are melted and slightly golden.
-
Drizzle vanilla extract over the melted marshmallows for added flavor.
-
Allow the bars to cool before cutting into squares and serving.