Discover the easiest homemade delicious no-churn ice cream recipe that requires no special equipment. Quick, creamy, and perfect for any occasion. Get this amazing recipe from www.bbrecipes.com today!
Table of Contents
Introduction
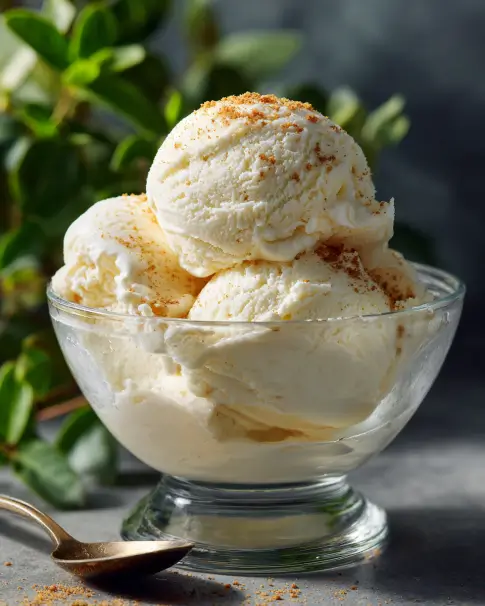
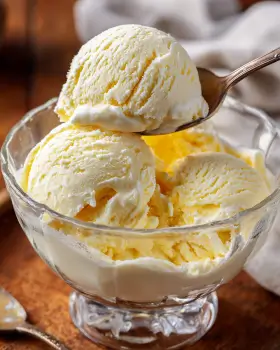
Craving creamy, rich ice cream but don’t have an ice cream maker? This delicious no-churn ice cream recipe is about to become your new favorite dessert solution. With just a few simple ingredients and minimal effort, you can create restaurant-quality ice cream right in your own kitchen. This homemade treat is perfect for hot summer days, family gatherings, or whenever you want to indulge in something truly special.
What makes this delicious no-churn ice cream so incredible is its simplicity. You don’t need any fancy equipment or complicated techniques. Just whip, fold, freeze, and enjoy. The result is a luxuriously smooth and creamy ice cream that rivals any store-bought version. Whether you’re a beginner cook or an experienced baker, this recipe guarantees success every time.
Ingredients List
Basic Delicious No-Churn Ice Cream Ingredients:
- 2 cups heavy whipping cream (cold)
- 1 can (14 oz) sweetened condensed milk
- 1 teaspoon pure vanilla extract
- 1/4 teaspoon salt
- Optional add-ins: chocolate chips, fruit, nuts, or cookie pieces
Equipment Needed:
- Large mixing bowl
- Electric mixer (hand or stand mixer)
- Rubber spatula
- Freezer-safe container with lid
- Measuring cups and spoons
Nutrition Facts (Per 1/2 Cup Serving)
- Calories: 285
- Total Fat: 18g
- Saturated Fat: 11g
- Cholesterol: 65mg
- Sodium: 85mg
- Total Carbohydrates: 28g
- Sugars: 28g
- Protein: 5g
- Calcium: 15% DV
- Vitamin A: 12% DV
Note: Nutrition values may vary based on specific ingredients and add-ins used in your delicious no-churn ice cream recipe.
Preparation Instructions
Step 1: Prepare Your Equipment
Chill your mixing bowl and beaters in the freezer for 15 minutes before starting. This helps achieve the perfect texture for your delicious no-churn ice cream. Cold equipment ensures the cream whips properly and maintains its structure.
Step 2: Whip the Cream
Pour the cold heavy cream into your chilled bowl. Using an electric mixer on medium-high speed, whip the cream until stiff peaks form. This usually takes 3-4 minutes. Be careful not to over-whip, as this can turn your cream into butter and ruin your delicious no-churn ice cream.
Step 3: Prepare the Base
In a separate bowl, combine the sweetened condensed milk, vanilla extract, and salt. Whisk until smooth and well combined. This mixture forms the sweet, creamy base that makes this delicious no-churn ice cream so irresistible.
Step 4: Fold Together
Using a rubber spatula, gently fold one-third of the whipped cream into the condensed milk mixture. Be gentle to maintain the airy texture. Once combined, fold this mixture back into the remaining whipped cream. The key to perfect delicious no-churn ice cream is maintaining those air bubbles.
Step 5: Add Mix-ins
If you’re adding chocolate chips, fruit, or other mix-ins, gently fold them in now. Don’t overmix, as this can deflate your carefully whipped cream and affect the final texture of your delicious no-churn ice cream.
Step 6: Freeze
Transfer the mixture to your freezer-safe container. Smooth the top with a spatula and cover tightly with plastic wrap, pressing it directly onto the surface to prevent ice crystals. Cover with the lid and freeze for at least 6 hours or overnight.
Serving Suggestions
Your delicious no-churn ice cream is incredibly versatile and can be served in countless ways. Scoop it into bowls or cones for a classic treat. Create an impressive dessert by serving it alongside warm brownies or fresh fruit. For special occasions, layer it with cake and whipped cream to make an elegant trifle.
This homemade ice cream pairs beautifully with hot desserts like apple pie, chocolate lava cake, or warm cookies. The contrast between the cold, creamy ice cream and warm desserts creates a perfect balance. You can also use it as a base for milkshakes or sundaes, topped with your favorite sauces and garnishes.
For a sophisticated presentation, serve your delicious no-churn ice cream in chilled glasses with a drizzle of caramel or chocolate sauce. Garnish with fresh berries, mint leaves, or a sprinkle of sea salt for an gourmet touch that will impress your guests.
Pro Tips
Temperature is crucial for perfect delicious no-churn ice cream. Make sure your cream is very cold before whipping, and your freezer is set to 0°F or below. This ensures proper texture and prevents ice crystals from forming.
Don’t skip the salt in your recipe. It enhances the sweetness and helps balance the flavors, making your delicious no-churn ice cream taste more complex and satisfying. The salt also helps with the texture by preventing the mixture from becoming too sweet and cloying.
When folding ingredients together, use a light hand and work quickly. Over-mixing will deflate the whipped cream and result in a denser final product. The goal is to maintain as much air as possible for that signature creamy texture.
Store your delicious no-churn ice cream properly by pressing plastic wrap directly onto the surface before covering with a lid. This prevents freezer burn and ice crystal formation. For best quality, consume within 2-3 months.
Variations
Chocolate Delicious No-Churn Ice Cream
Add 1/4 cup cocoa powder to the condensed milk mixture and fold in 1/2 cup mini chocolate chips. This variation creates a rich, chocolate lover’s dream that’s perfect for any chocolate craving.
Strawberry Delicious No-Churn Ice Cream
Puree 1 cup fresh strawberries and swirl into the mixture before freezing. You can also add freeze-dried strawberries for intense flavor and beautiful color. This fruity variation is perfect for summer gatherings.
Coffee Delicious No-Churn Ice Cream
Dissolve 2 tablespoons instant coffee in 1 tablespoon warm water and add to the condensed milk mixture. This creates a sophisticated coffee-flavored treat that’s perfect for adults.
Cookies and Cream Variation
Crush 15 chocolate sandwich cookies and fold them into your mixture. This popular variation mimics the classic store-bought flavor but with homemade quality that’s far superior.
Mint Chocolate Chip Alternative
Replace vanilla with mint extract and add green food coloring if desired. Fold in mini chocolate chips for a refreshing twist on your delicious no-churn ice cream.
FAQ
Q: How long does this delicious no-churn ice cream last in the freezer? A: When stored properly in an airtight container, your homemade ice cream will maintain its best quality for 2-3 months. However, it’s usually consumed much faster than that because it’s so delicious!
Q: Can I make this recipe without an electric mixer? A: While an electric mixer makes the process much easier, you can whip the cream by hand using a whisk. It will take considerably longer and require more effort, but it’s possible to achieve the same results.
Q: Why is my delicious no-churn ice cream too hard to scoop? A: This usually happens when the freezer temperature is too low or the ice cream has been frozen for too long. Let it sit at room temperature for 5-10 minutes before scooping to soften slightly.
Q: Can I reduce the sugar in this recipe? A: The sweetened condensed milk provides both sweetness and the creamy texture essential to this delicious no-churn ice cream. Reducing it significantly will affect both taste and texture. For a less sweet version, try using light sweetened condensed milk.
Q: What’s the best way to prevent ice crystals? A: Always press plastic wrap directly onto the surface of your ice cream before covering with a lid. This prevents air exposure and ice crystal formation, keeping your delicious no-churn ice cream smooth and creamy.
Conclusion
This delicious no-churn ice cream recipe proves that amazing homemade desserts don’t have to be complicated. With just a few simple ingredients and basic techniques, you can create a dessert that rivals any premium ice cream shop. The beauty of this recipe lies in its simplicity and versatility, making it perfect for both beginners and experienced home cooks.
Whether you stick with the classic vanilla version or experiment with exciting variations, this delicious no-churn ice cream is sure to become a family favorite. The creamy texture, rich flavor, and endless customization possibilities make it the perfect treat for any occasion.
We encourage you to try this recipe and share your results with us. What flavor combinations will you create? Have you discovered any unique mix-ins that work particularly well? Your feedback and creativity help make www.bbrecipes.com the go-to destination for reliable, delicious recipes that bring families together.
Don’t forget to explore our other amazing dessert recipes and cooking tips. From quick weeknight dinners to show-stopping holiday treats, www.bbrecipes.com has everything you need to create memorable meals and desserts. Happy cooking, and enjoy your homemade delicious no-churn ice cream!